How To Remove The CA7 Side Mount Auxiliary
Question:
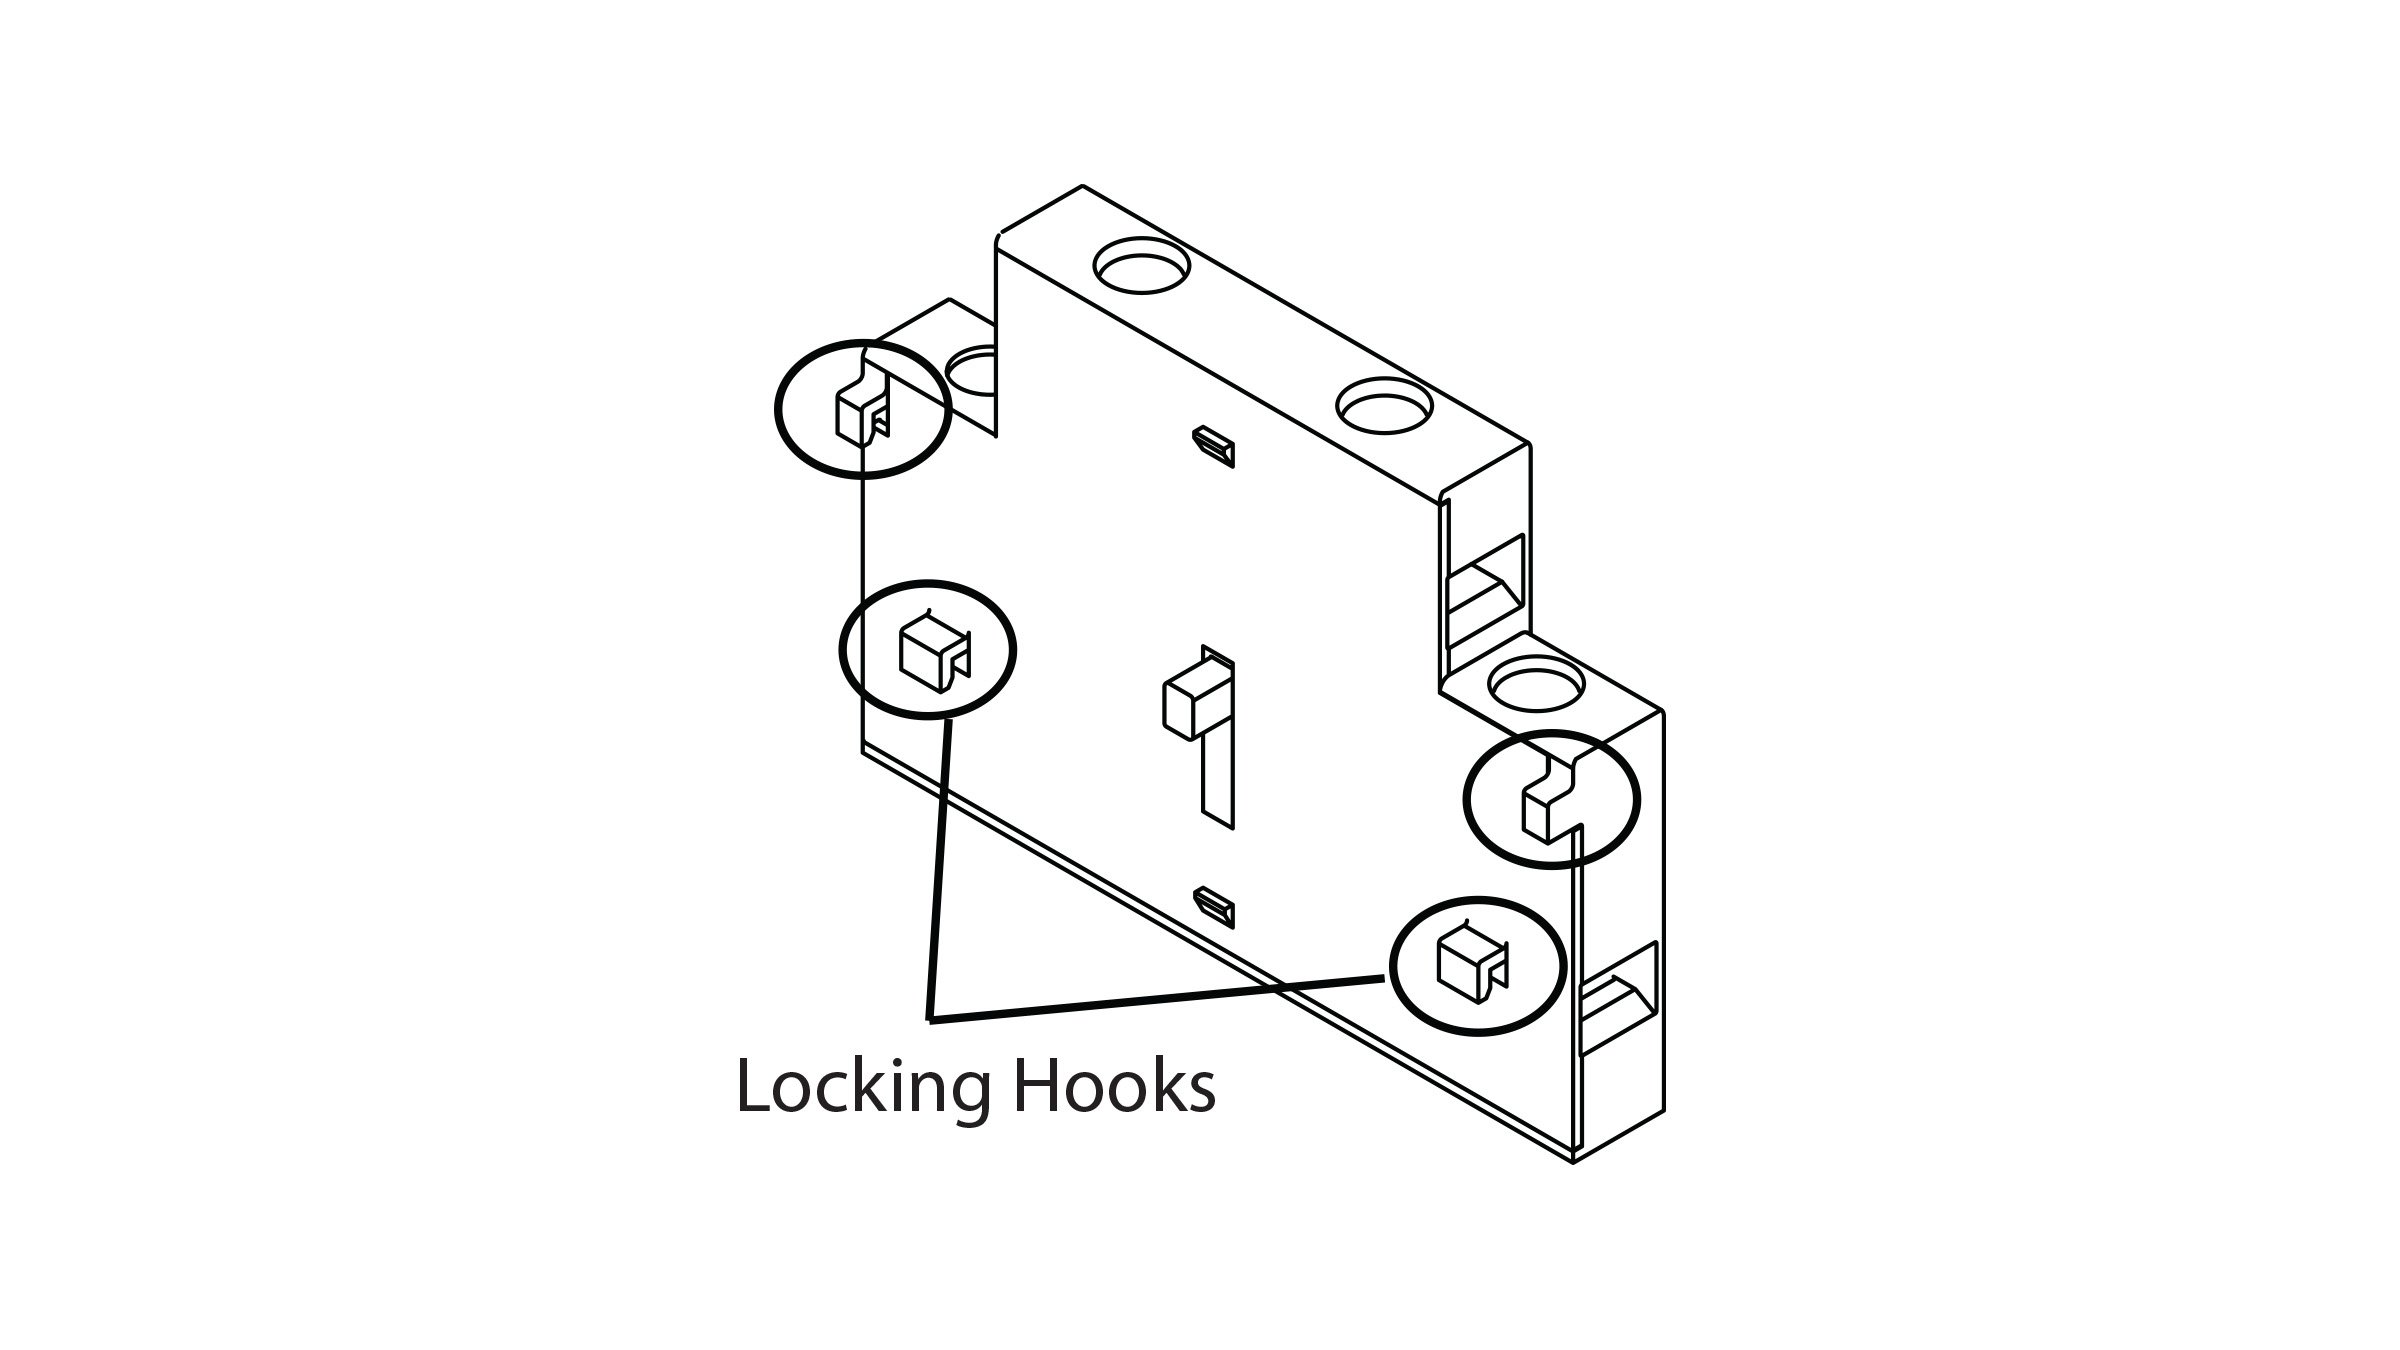
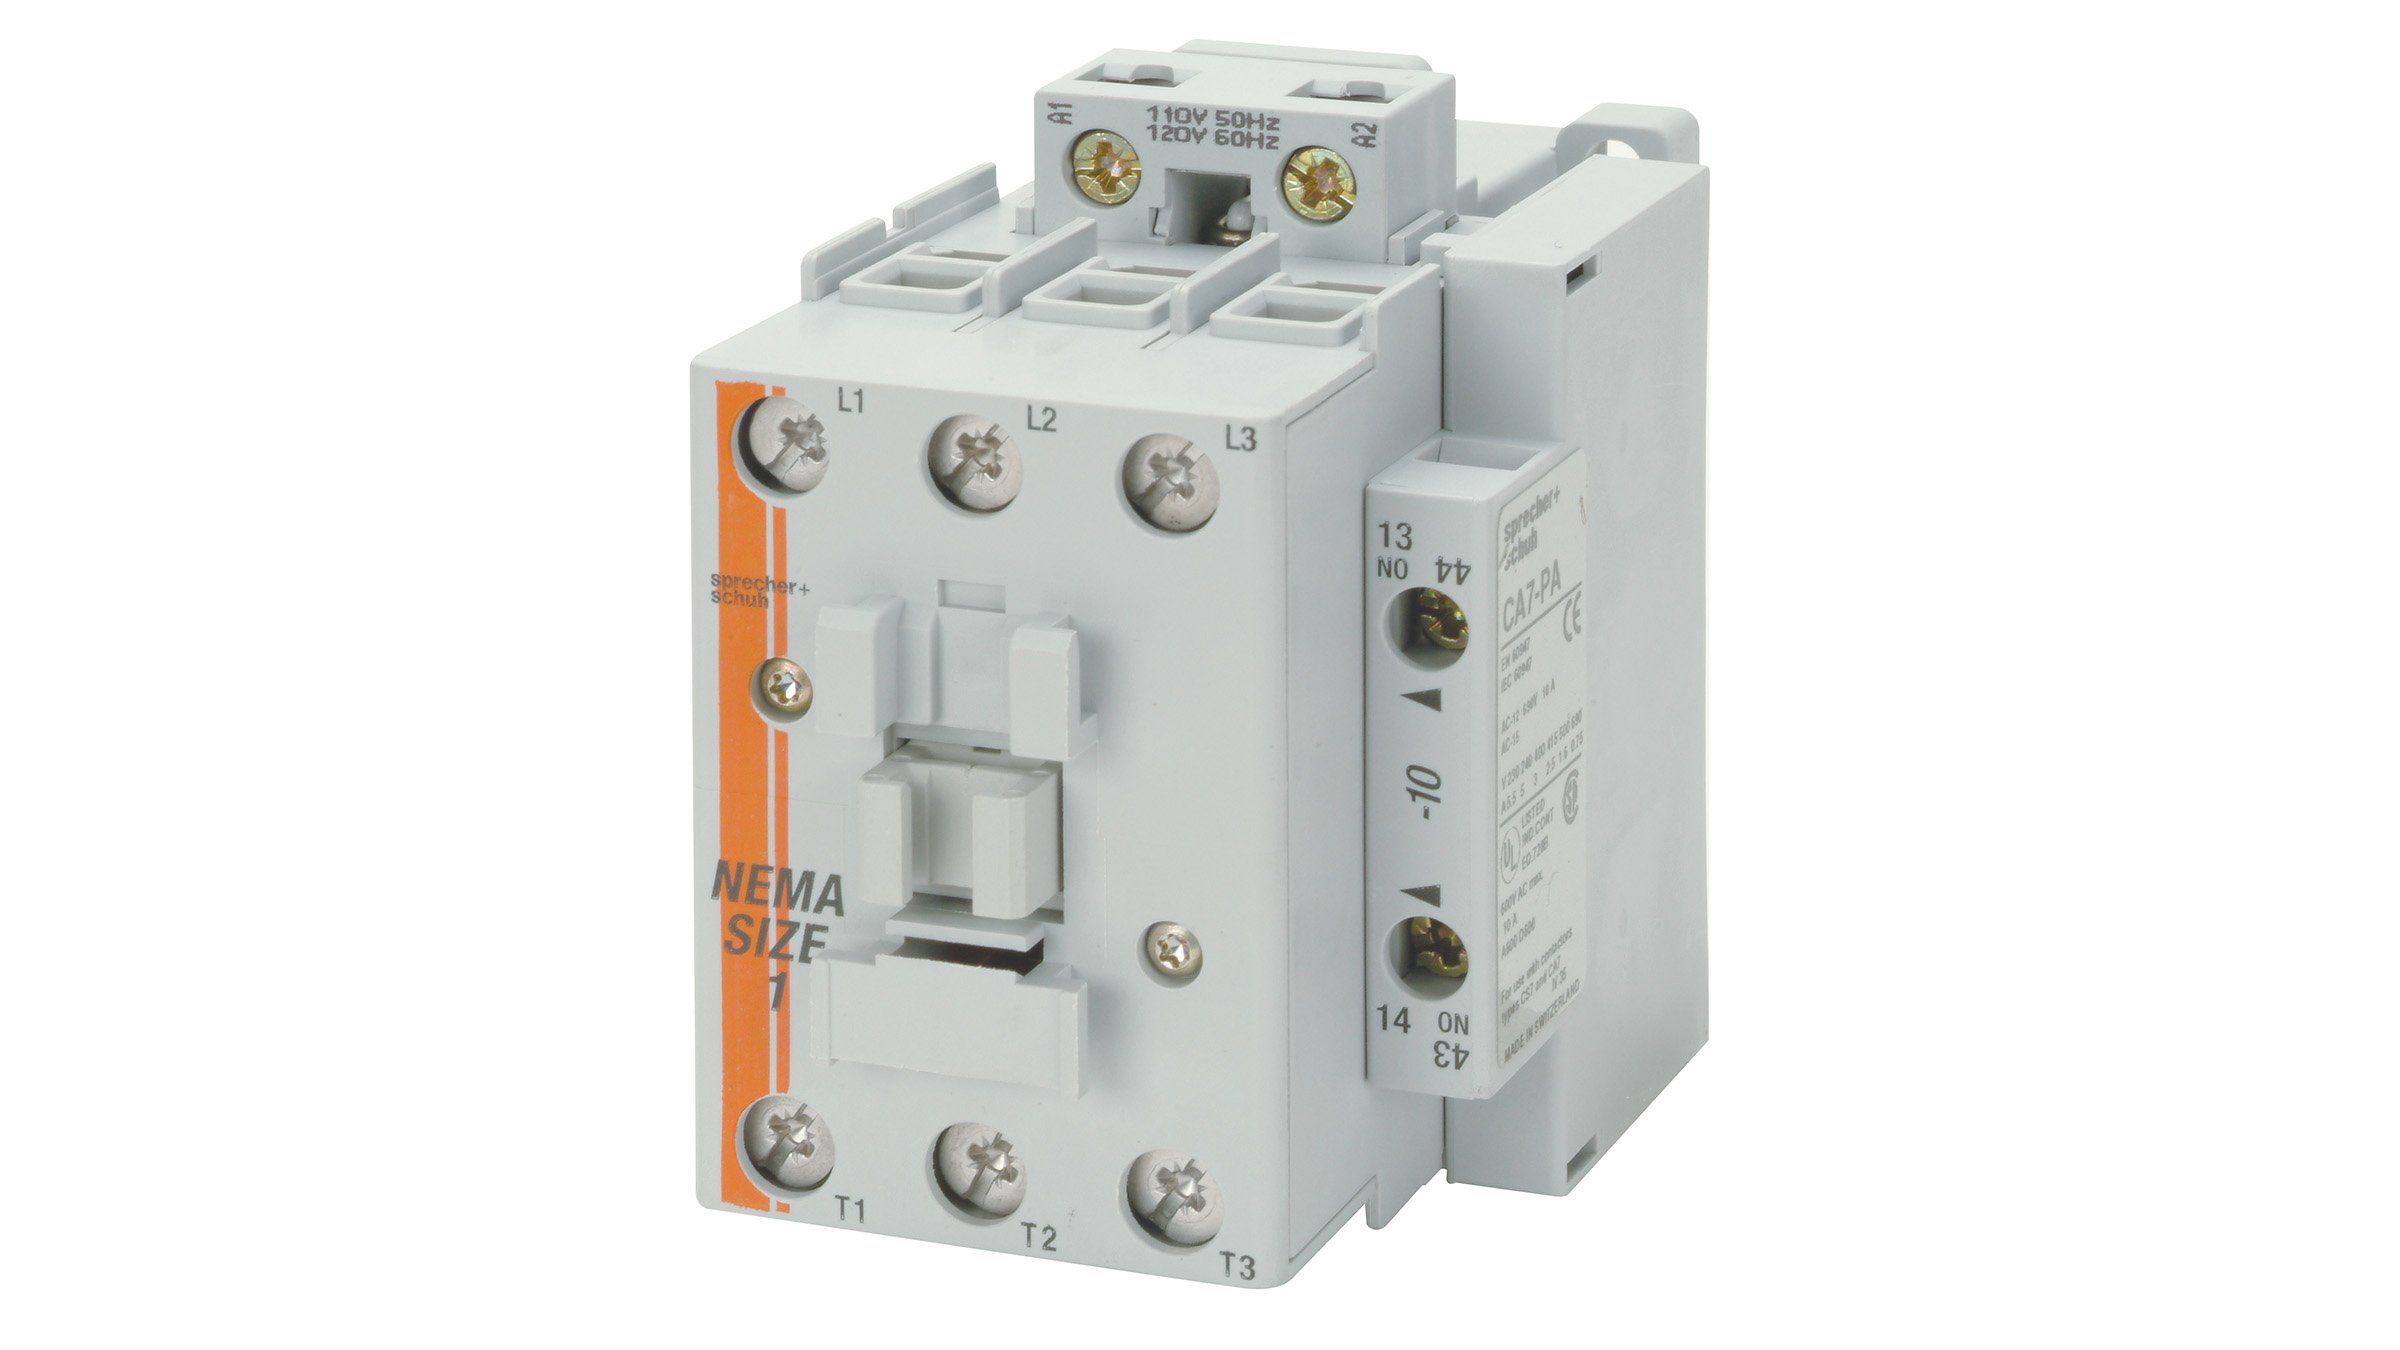
What is the proper way to remove a side mount auxiliary contact from a CA7 without breaking off any of the four small plastic latches?
Answer:
The small plastic latches that secure the auxiliary to the contactor can easily snap off when applying too much force. There are three easy steps for removing the auxiliary.


Related Links

For smaller contactors and relays, sizes 9 to 23 amps
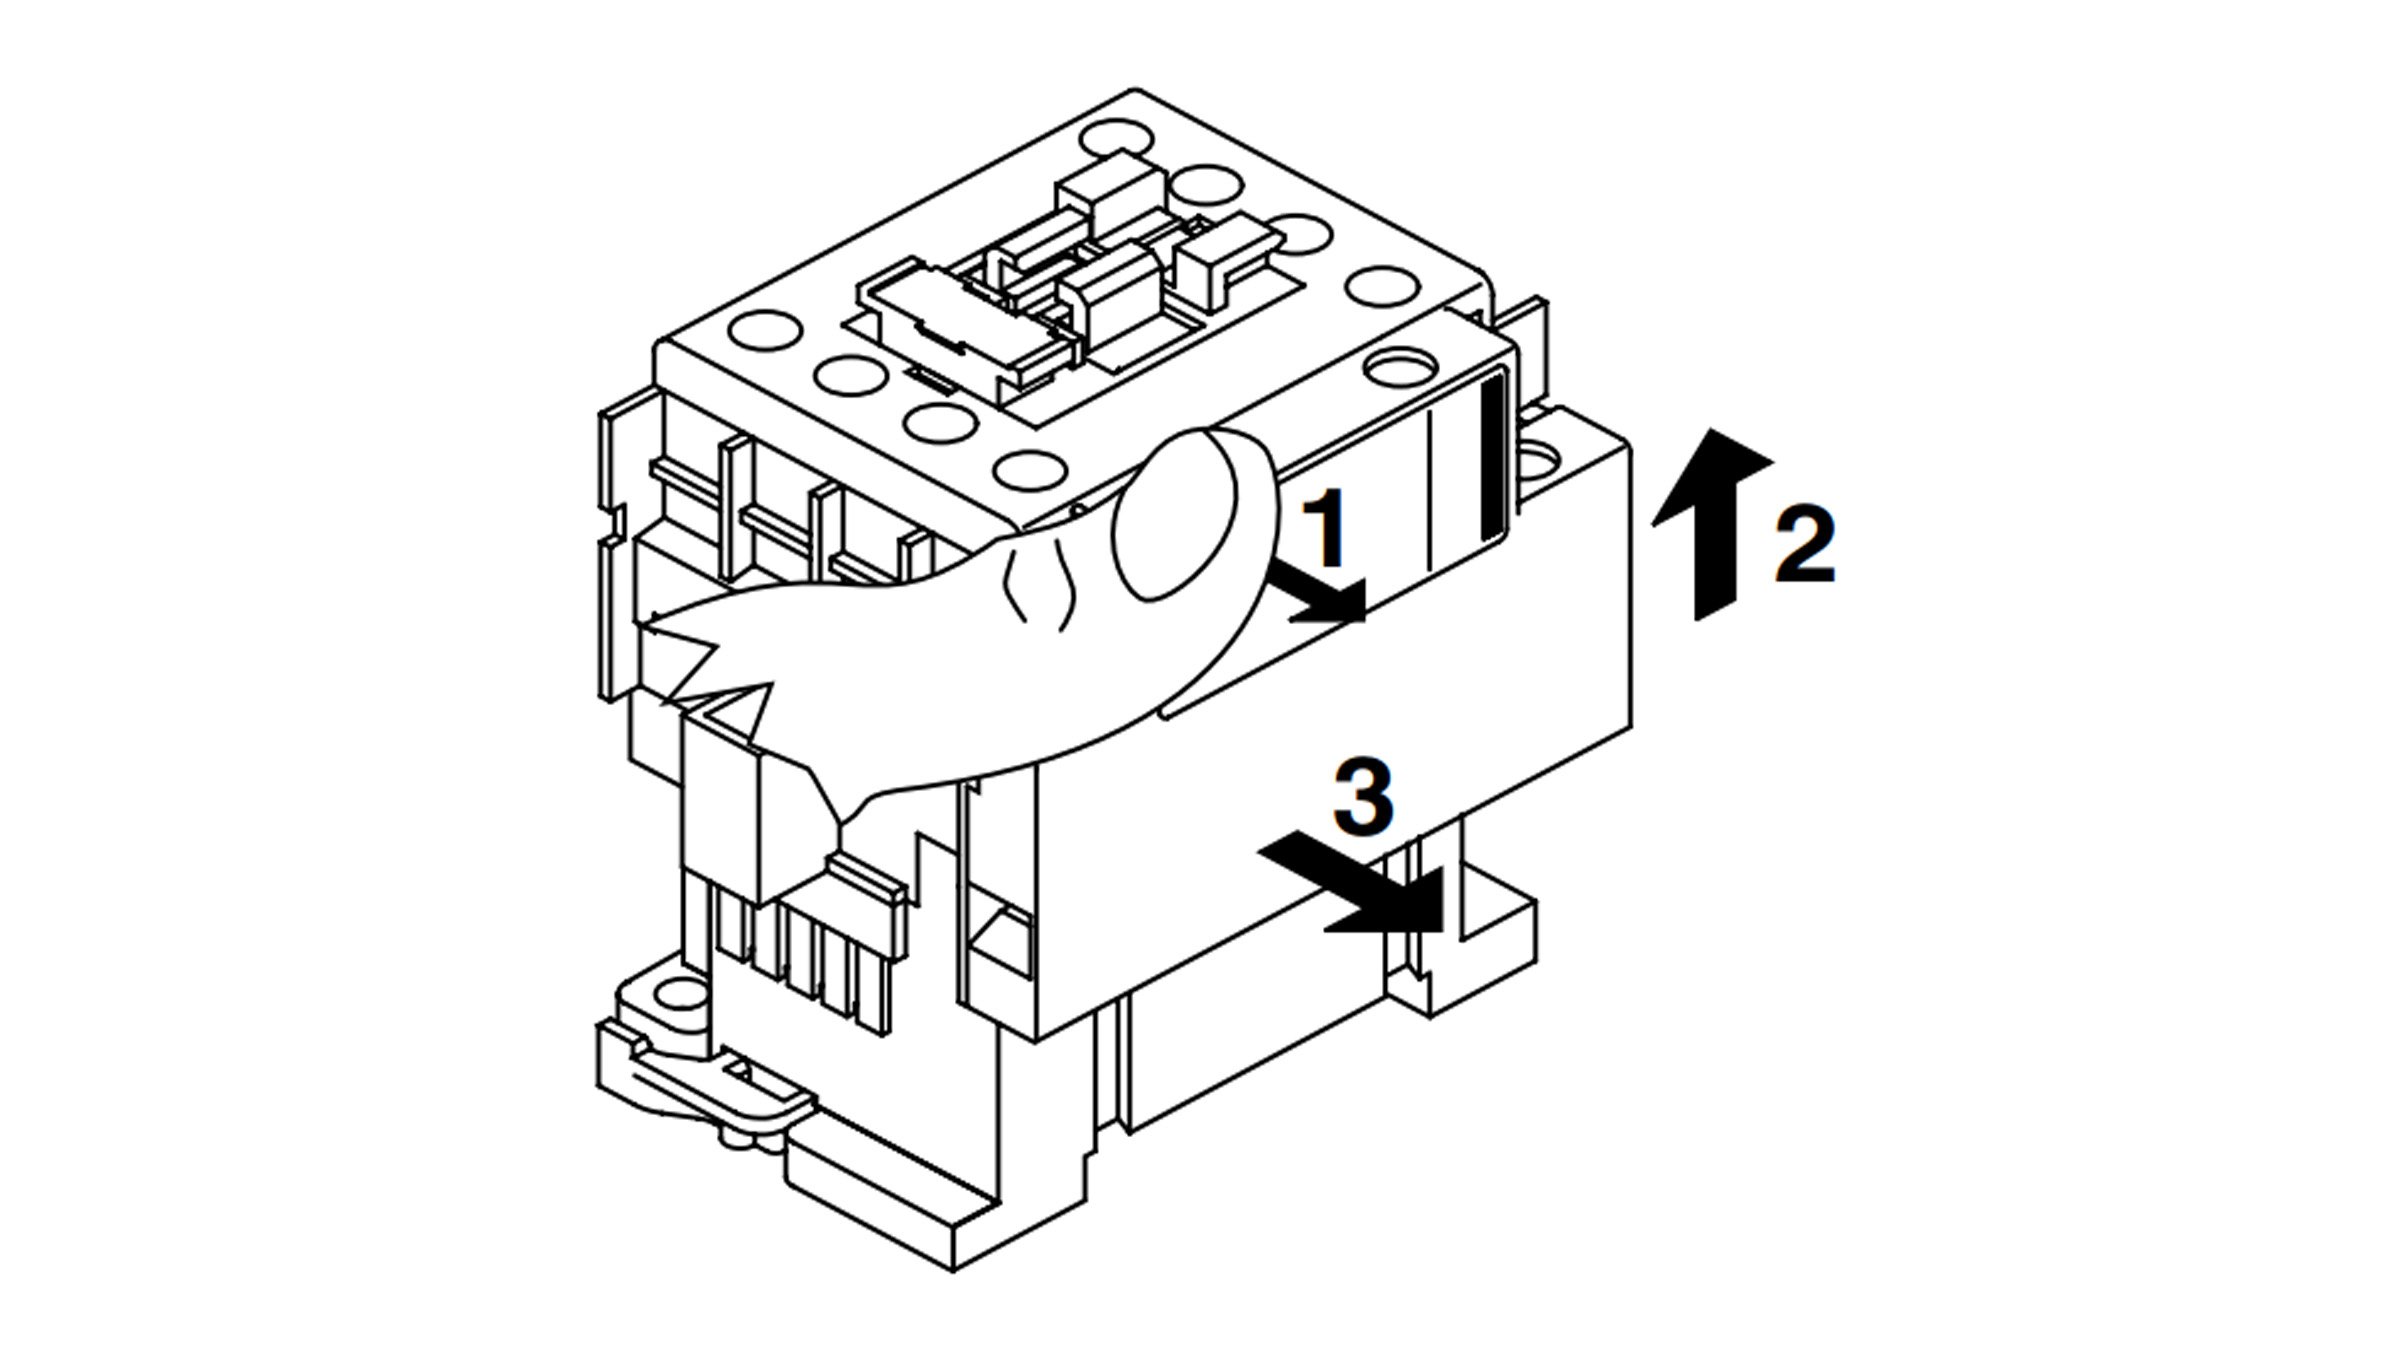
Step 1
- Grasp the contactor with your left hand.
- Put the thumb of your right on top of the aux contact and your first two fingers under the bottom of the aux contact.
- Using your thumb only, pull the top of the auxiliary contact slightly away from the contactor approximately .020" (.5mm). NOTE: going farther than .030" may result in the breaking of one or both of the two top side locking hooks.
Step 2
- While keeping the auxiliary slightly pulled away from the top of the contactor, use your fingers (that are under the auxiliary) to lift it up slightly to disengage the two side locking hooks from the two slots on the side of the contactor.
Step 3
- Use your thumb and two fingers to remove the auxiliary contact from the contactor.

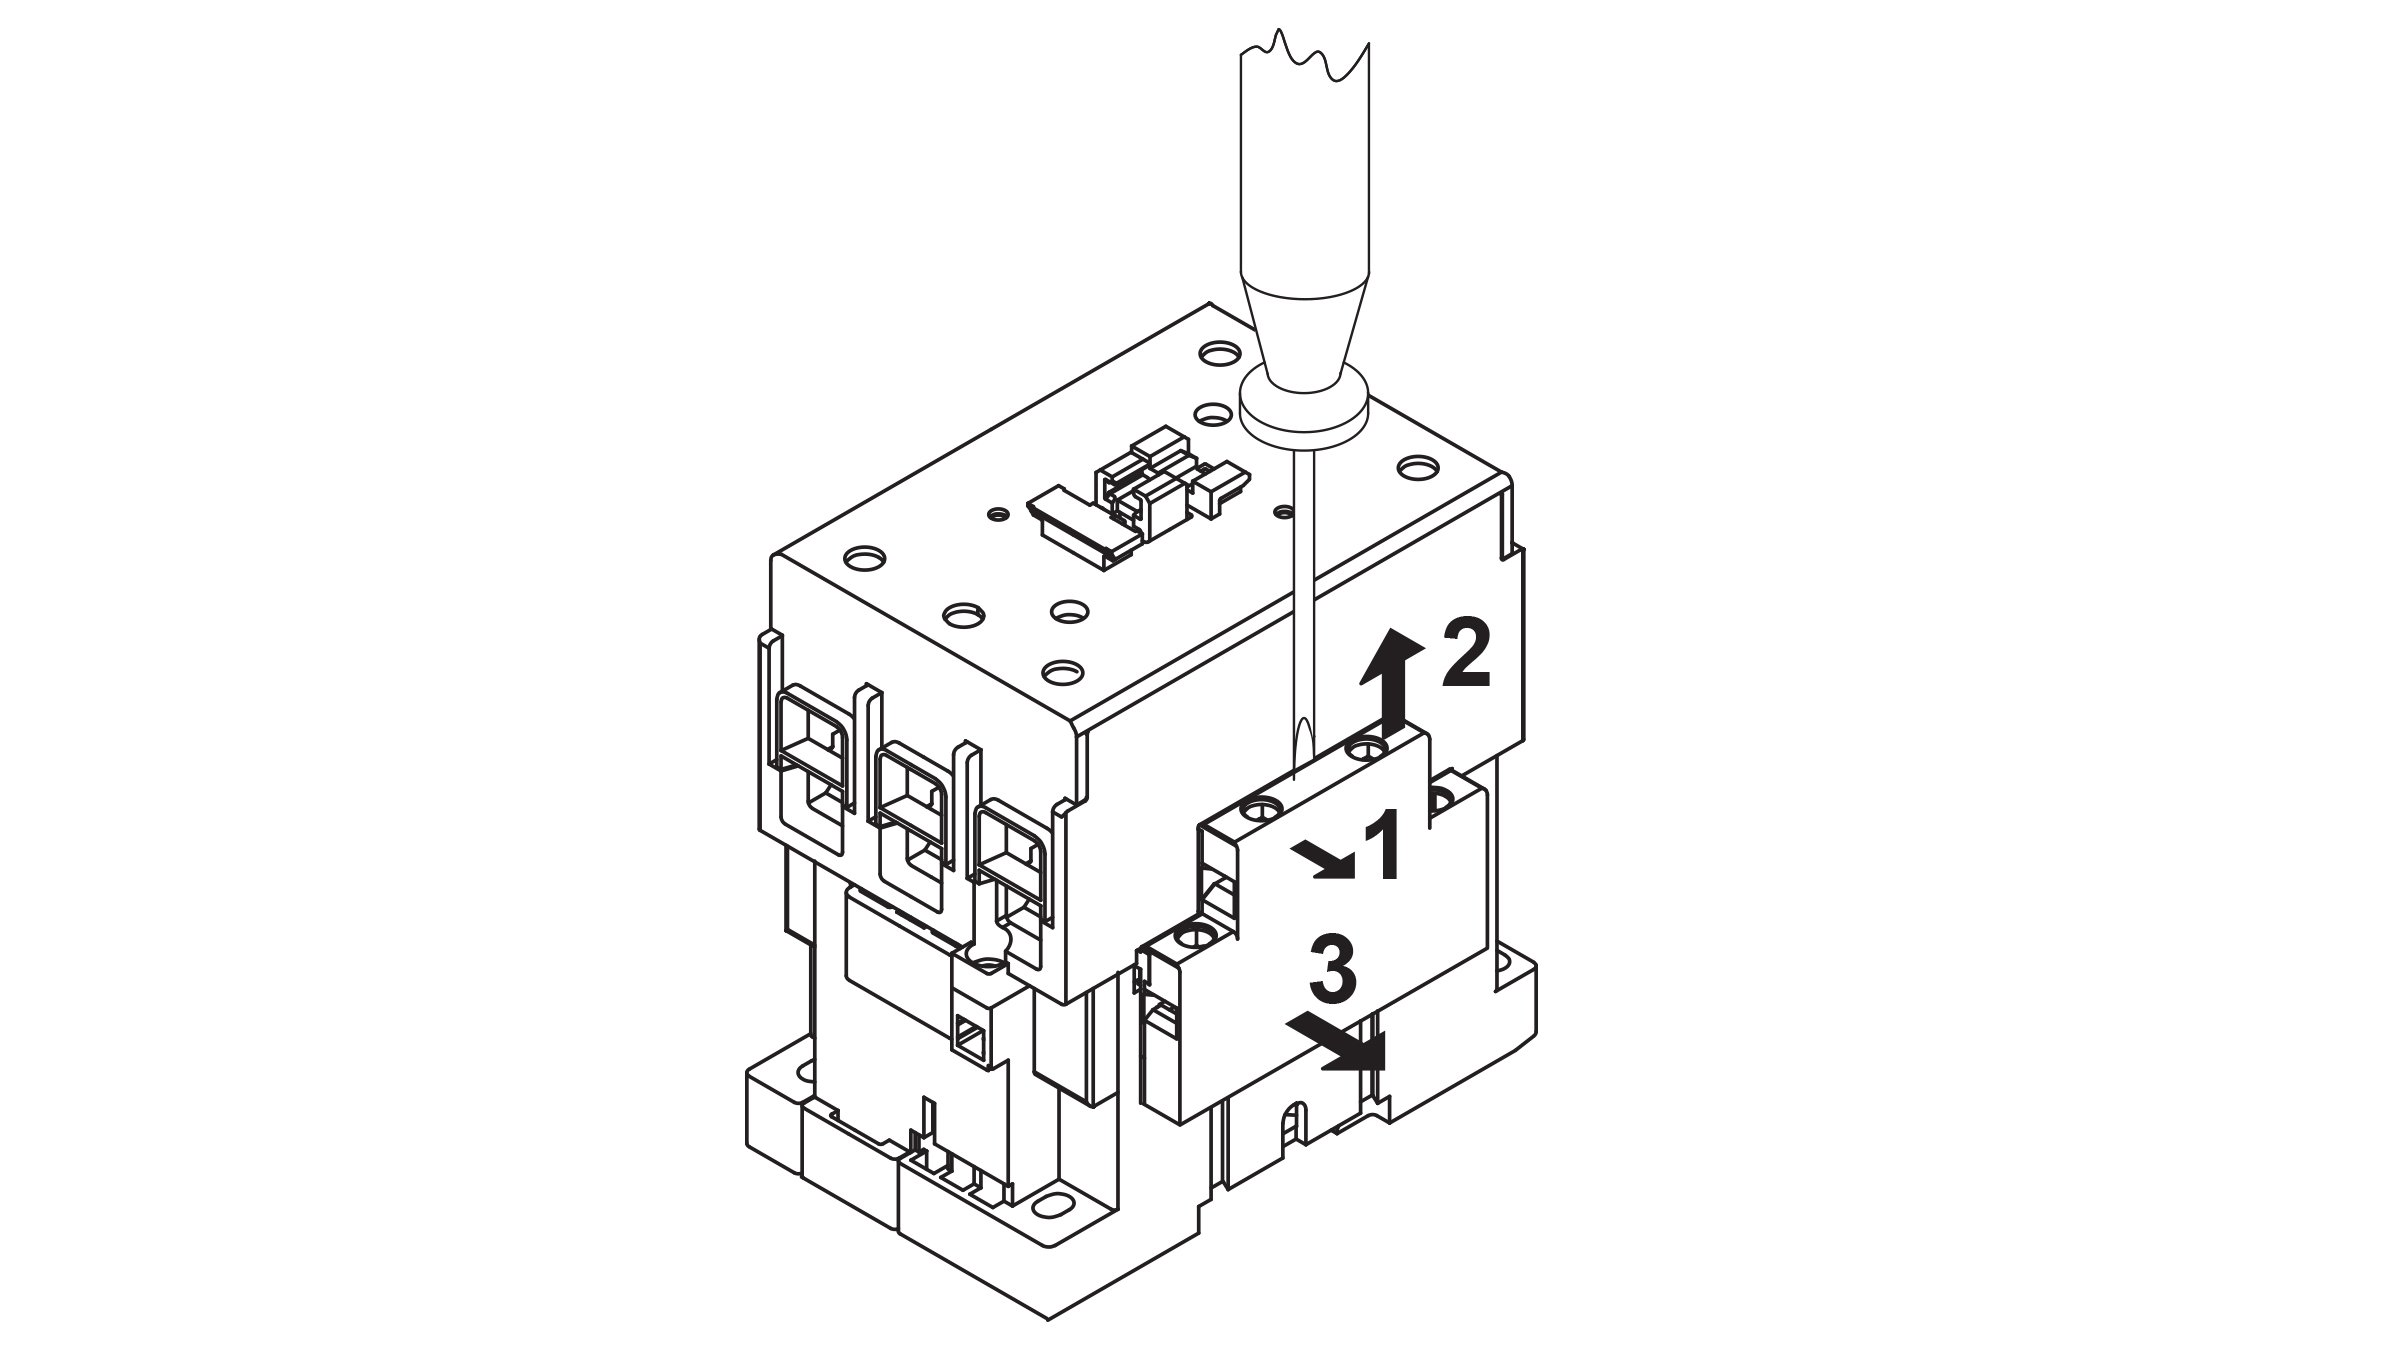
For larger contactors, sizes 30 amps and larger,
or if the hand method above is problematic, a small 0.5 x 3mm flat head screwdriver can be used. Insert the tip of the screwdriver between the edge of the front of the auxiliary and side of the contactor. Give a small twist or flex to gently push the top of the auxiliary away from the side of the contactor. Now lift up and away with the other hand. NOTE: Going farther than .030" may result in the breaking of one or both of the two top side locking hooks.
This method applies to side mount auxiliary contacts with part numbers of CA7-PA-*. For complete instructions on all CA7 and CS7 coils and auxiliaries please see the instruction sheets in the Sprecher + Schuh library.
For additional information please contact your nearest authorized distributor, sales representative, or call our customer service or technical support lines.